


Welcome Back!
Hey! I couldn’t wait to touch base with you again! Just over a week ago, the Quilting Central Podcast held a virtual quilting retreat. As part of the retreat, Cathy, Julie and I each presented a “how to” quilting related project.
If you were able to participate in the retreat, we’d love to get your feedback. What did you think of the format, content and projects?
And if you couldn’t participate, guess what! Just click to see the Angie’s Answers YouTube video of the project I presented: Mini Fabric Tote/Basket using Handi Quilter Pro-Stitcher and a domestic machine. (And I’d love to hear your feedback on the project!)
We’re exploring new, unchartered territory with the podcast. It’s totally fun … but, as you might expect, there’s a little nervousness and craziness added into the mix!
Now to shift gears. I’m ready to relax and share some information with you on a topic that’s just as much fun. Let’s continue our discussion about the different methods of longarm quilting and building our longarm skills. We’ve already covered free-motion quilting and one of its sub-sets, ruler-work. Today I’m going to talk about pantograph quilting on the longarm.
What is Pantograph Longarm Quilting?
When pantograph quilting, a quilter follows a continuous-line pattern that is printed on a long roll of paper.
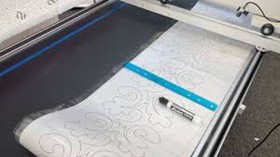
The paper pattern is placed under a sheet of plastic covering the back table of the longarm’s frame.
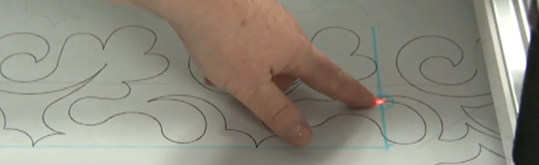
Then the quilter follows the line design of the pattern with a laser light or stylus from the back of the machine. The result is an allover (or edge-to-edge) design stitched across the quilt.
Additional equipment needed
If you’re going to pantograph, your longarm and frame need to be equipped with a few additional accessories.
As mentioned above, the back table of your frame needs to be covered with a sheet of plastic. The paper pattern is placed under the plastic. This covering keeps the pattern flat and allows you to mark start and stop points and make any needed pattern adjustments without drawing on the pattern itself.
NOTE: Wet erase markers allow you to draw on the plastic sheet and then remove your markings with water when you’re done quilting.

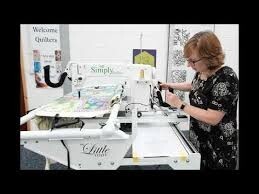
Your machine needs to be fitted with a ‘quilt from the back’ kit. This adds the handlebars on the back of your machine head. They allow you to guide your machine as you follow the pattern design. The kit also provides the laser light and any cables needed.
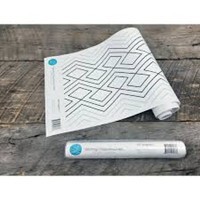
Finally, you need the paper pantograph patterns themselves. Preprinted pantograph patterns come in 12’ rolls. The height of the design can vary from 3.5” to over 15”.
NOTE: The throat space of your longarm dictates the maximum size of pattern design that will work for your machine. For example, if your machine’s throat space is 20”, the recommended maximum design height would be 13-14”.
The basic process
Pantograph quilting follows these basic steps:
- Secure the paper pantograph pattern under the plastic sheet covering the back table of your longarm frame.
- Align the needle and the laser light/stylus with the starting position of your quilting.
- Make any adjustments to the pattern design along the top and side edges so you know where you’re stitching once you begin. Mark your start, stop and realignment points.
- Begin stitching by tracing the pattern design. You’ll complete one row at a time. After completing your first row – depending on your pattern design – you may need to stitch a partial row to fill any open spaces between your quilting and the top edge of the quilt.
- Advance your quilt once you’ve completed the one or two rows of design provided on your pattern.
- Realign your needle and the pattern to maintain proper spacing between rows.
- Repeat the process until you’ve completed the last full row that fits on your quilt.
- Advance your quilt and mark the portion of the pattern needed to fill any remaining unquilted area of your quilt. Realign your needle and the pattern. Stitch the final row.
Benefits of Pantograph Longarm Quilting
Pantograph quilting can be a great starting point as a longarm quilter … especially if you’re interested in growing your free-motion skills. Following basic pantograph designs can help build your personal design repertoire, muscle memory and confidence.
Additional benefits include:
Consistency – Pantograph quilting easily produces evenly spaced, repeatable quilting designs.
Speed – Faster than custom quilted designs yet produces professional, polished results.
Forgiving – Because you’re quilting an overall design, minor imperfections won’t show.
Creativity – Even though you’re following a printed pattern, you can still make modifications to it or combine your use of pantograph quilting with free-motion or custom quilting.
From a self-care perspective, many quilters find the rhythmic movement of pantograph quilting relaxing and meditative!
Choosing a Pantograph Pattern
So, what should you consider when selecting a pantograph design?
Complexity – Factor in your skill level and time requirements when choosing the quilting design. If you’re a beginner, start with simple patterns. Build your stamina and confidence before moving to complex or intricate designs. A more basic pattern will also quilt faster if you’re trying to meet a tight deadline.
Scale – The size of the design you choose impacts your final results. First, make sure the size of the pattern and its repeat fits proportionally with the size and style of your project. Second, if you want your finished quilt to be cuddly, choose a larger, more open pattern. Tight, denser designs work better for wall-hangings or show quilts.
Theme – Consider selecting a pattern that accents the purpose/theme of your quilt or, if a gift, the recipient’s personality.
Some Final Tips for Pantograph Success
- Practice – Yes, there’s that ‘p’ word again.
- When you’re starting out, you need to develop a light touch for guiding your longarm, learn how to relax your neck and shoulders, breathe regularly and evenly, and find your rhythm for moving your feet as you move your machine. In fact, a beginner may find pantograph quilting tiring, both physically and mentally, so give yourself time to build your stamina.
- Even once you’re an experienced pantograph quilter, practice a new pattern before actually using it on your project. Completing a practice piece helps you get comfortable with the flow of the pattern so you produce smooth, consistent designs from start to finish.
- Develop a steady pace – Quilting too fast or slow may cause you to jerk or wobble as you try to follow the pattern.
- Be kind to yourself – Don’t expect to stay right on the pattern lines. There are no quilting police looking for slight differences in the size or shape of motifs. You’re human and your quilting can reflect that!
- Check your alignment after advancing your quilt – Avoid gaps and/or overlaps between the rows of your quilting.
- Store your pantograph patterns carefully – You want to prevent creases in the paper pattern that could throw off your accuracy when quilting or realigning your design.
So, what are your thoughts on pantograph quilting? Can you see how using this method of quilting will increase your longarm quilting skillset … ways it can add new outlets to your quilting creativity?
If you’d like to experience pantograph quilting but don’t have access to a longarm setup for pantograph, please consider signing up for one of our Beginning Longarm Rental Classes. In the class, we introduce quilters to free-motion, pantograph and computerized quilting. You’ll get time to test-drive pantograph quilting on a Handi Quilter longarm all setup to go!
Then if you discover this is a method of quilting you might like to add to your repertoire, you can rent time on our machines while deciding if or when you’d like to add the needed equipment to your own longarm.
Okay, so far I’ve shared information, techniques and tips on free-motion longarm quilting, ruler-work and pantograph longarm quilting. Next post I’ll dive into computerized quilting. So let’s wrap up today’s post with reminders of what’s happening at The Quilting Connection!
In-person Classes at Quilting Connection!
Basic Free-motion Class with Wendy Fuller
Friday, October 17, 2025 (Appleton)
or
Saturday, October 18, 2025 (Elkhorn)
9:00 AM – 4:00 PM (lunch included)
These are small group, hands-on classes. Wendy will introduce you to a variety of free-motion quilting designs and the various techniques that can be used to produce them. You’ll look at the many ways to use the designs to fill your quilt blocks and borders.
You’ll also get plenty of hands-on time at the longarm, and you’ll go home with a practice piece to refer to and build on in the future!

Feathers Flowers and Leaves Class with Wendy Fuller
Friday, November 7, 2025 (Appleton)
or
Saturday, November 8, 2025 (Elkhorn)
9:00 AM – 4:00 PM (lunch included)
Want to broaden your free-motion repertoire?
Wendy will guide you in easy and popular ways to create
feathers, leaves, and flowers.
You’ll explore the many ways to use them in overall designs, blocks, and borders!
You’ll do a bit of drawing to introduce you to some designs, then you’ll get busy on the longarm practicing them. And, of course, you’ll go home with your practice piece!
Ruler and Gridwork Class with Wendy Fuller
Friday, November 21, 2025 (Appleton)
or
Saturday, November 22, 2025 (Elkhorn)
9:00 AM – 4:00 PM (lunch included)
Ruler Class Description:
There are so many ways to use rulers! In this small, hands-on class, Wendy will show you tips and tricks for using rulers safely and effectively on your longarm to create straight lines, curves, circles, and arcs/swags.
She’ll teach you how to combine patterns to create complex looking designs. You'll learn how to use these designs for blocks, borders, sashings, and edge to edge options!
You’ll also get plenty of time on the longarm to stitch out some designs and try out different rulers to see which ones you may want to start adding to your quilting tool kit. And, of course, you’ll go home with your practice piece to refer to in the future!
Gridwork Class description:
What is "Grid-work"? It's when you quilt a grid-based design that can use stencils/marking or piecing lines to guide your quilting. Some common examples are "continuous curves" and "orange peel", but the possibilities are endless!
After a little instruction, you'll get to practice designs on the longarm that can be done free motion or with rulers. Wendy will show you how to scale the designs to fit your quilt.
There are so many options for blocks, borders, and background fills!
This class is for beginners through experienced skill levels. There are plenty of options to challenge us all!
AN ADDED NOTE FOR ALL OF WENDY’S CLASSES
Have a project you’re not sure how to quilt? Feel free to bring it along, and you’ll work with Wendy to brainstorm specific ideas that fit both your quilt and your skill level. You’ll go home with a ready-to-execute plan to finish your project!
And please know that all classes are adapted to the experience level of the participants!
These classes fill quickly, so check your calendar and sign up soon!
*********************************************************
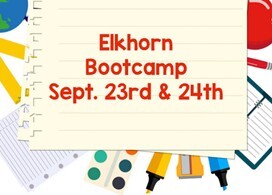
Beginning Longarm Bootcamp (Elkhorn)
Tuesday & Wednesday, September 23 & 24, 2025
9 AM – 4 PM (Lunch Included)
or
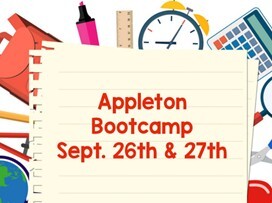
Beginning Longarm Bootcamp (Appleton)
Friday & Saturday, September 26 & 27, 2025
9 AM – 4 PM (Lunch Included)
These 2-day bootcamp classes are designed for quilters that don’t currently own a longarm but want to learn all about our amazing Handi Quilter machines! This is also a great refresher class if you own a Handi Quilter but haven’t had the opportunity to use it for a while!
Special Bonus: If you buy a Handi Quilter machine or Pro-Stitcher at this event, we’ll apply the cost of this class towards the purchase price!
Taught by HQ National Educator, Leigh Zipf, these 2-day classes are divided into four parts:
Day 1 morning covers longarm quilting basics. Leigh will explain machine and frame elements and features, how to load a quilt, and share vital facts about thread, needles and tension.
Day 1 afternoon covers sweet and simple free motion basics. You’ll learn how drawing and muscle memory contribute to free motion quilting and how to create stunning designs.
Day 2 morning covers radical rulers! Leigh will show you how to handle rulers and templates safely using the ruler base and Sure Foot. You’ll see how these tools can assist you in placing designs accurately and stitching them out precisely.
Day 2 afternoon covers Pro-Stitcher basics. Pro-Stitcher is the intuitive computer-guided quilting system designed specifically for use with Handi Quilter longarm machines. It is user-friendly and simple to operate. And you’ll find the step-by-step process for each function easy and fun.
Advanced Pro-Stitcher Class (Elkhorn)
Monday, September 22, 2025
9 AM – 4 PM (Lunch Included)
or
Advanced Pro-Stitcher Class (Appleton)
Sunday, September 28, 2025
9 AM – 4 PM (Lunch Included)
I’ll teach you how to place and stitch borders, turn a piece of edge-to-edge design into a block design, use the mark feature, stitch out triangle designs, and crop designs. We might even get a chance to learn the magic of mandalas! You’ll finish a hands-on project using Pro-Stitcher!
See the Classes page of our website for even more details on all these classes.
September Events
It’s almost here! Please join us next week at …

The Great Wisconsin Quilt Show is Wisconsin’s premier quilt show each year. Come for one, two or three fun-filled days in Madison, WI!
This year will be a little different for The Quilting Connection. We will be displaying our APQS longarm systems (Booths 233-34/303-04) and Superior Threads products (Booths 231/306).
NOTE: Our Elkhorn shop will be open during the Great Wisconsin Quilt Show,
but our Appleton location will be closed 9/5 & 9/6 . Sorry for any inconvenience!
****************************************************
Next on the calendar is our annual Appleton thankyou event held in partnership with our wonderful neighbor, Going to Pieces Quilt Shop!
While the free BBQ lunch is only served from 11:00 AM to 1:00 PM, our customer appreciation event lasts all day. There’ll be so much to see and do!
We’ll have fabric loaded on the APQS and Handi Quilter longarms so you can play!
(Ask any questions you may have about pantograph longarm quilting while you’re there.
We’ll gladly show you how it works!)
You can see the Laurastar steam generators in action!
And you can try out our new Ultimate Sewing Chairs!
Plus, we’ll have sales on Superior and Glide thread as well as Handi Quilter products!
Please join us in Appleton! We wouldn’t be here without you!
****************************************************
And wrapping up the month …

Sheboygan County Quilters Guild Annual Show
“Splashes of Color”
September 27, 2025
9:00 am – 4:00 pm
Sheboygan Lutheran High School
3323 University Drive
Sheboygan, WI 53081
Admission $7
Please join us! Be sure to stop by and say hi!
SALES!
![]()
This fantastic sale continues!
If it’s time to replace or upgrade your ironing system, stop in and learn all about the benefits of micro-steam technology! Check out Laurastar!
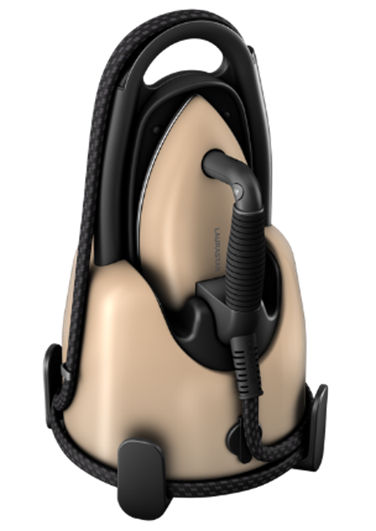
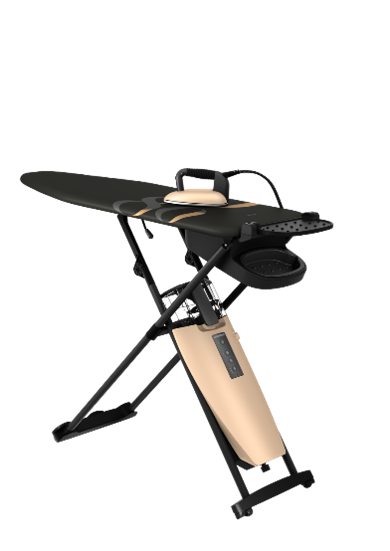
See the Laurastar page of our website for the sale pricing! Then contact us!
APQS: Sale
APQS continues to extend this wonderful sale opportunity!
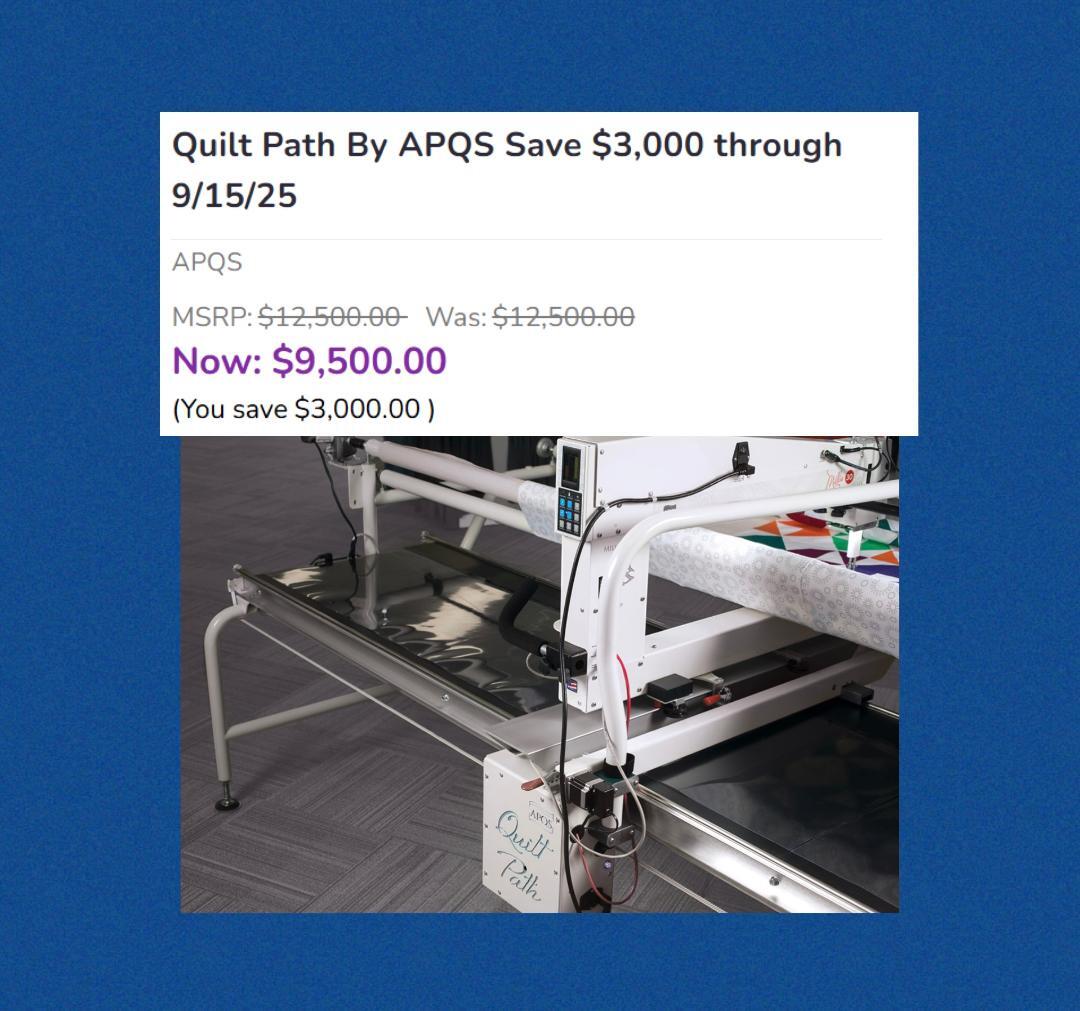
Please contact us for more details!
Handi Quilter: Sale
Handi Quilter’s current sale promotion is ending SOON! Act now if you’re interested!

Which bundle would you choose?
Please contact us for more details!
The Quilting Central Podcast Update
And finally, have you had a chance to catch the latest episode of The Quilting Central Podcast?
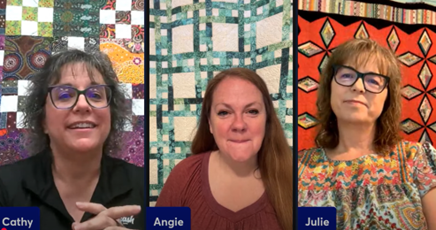
Check out Episode 9: Batting & Beyond. We update you on the many options available to today’s quilter!
For a complete listing of all our episodes posted to date, check out the Quilting Central Podcast YouTube channel! Be sure to subscribe and comment. We’d love to hear your thoughts!
And as always …
Please remember, if you ever have ANY questions or want additional information about ANY of the products and services we offer, please call us at (262) 723-6775 or email us at info@QuiltingConnection.com.
You can also visit us online at QuiltingConnection.com or in person at 21 Adams Street in Elkhorn, WI (usually M-F 9-4, please call to confirm we’re open) or 1017 W. Northland in Appleton, WI (W, Th & F 10-4, S 10-3).
Finally, check out our blog at QuiltingConnection.com/blog and our Facebook posts.
And please share your thoughts and questions. I’d love to hear from you!
Angie